Einleitung

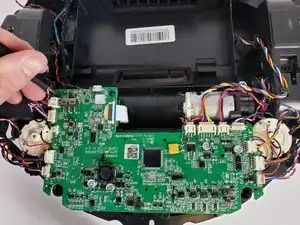
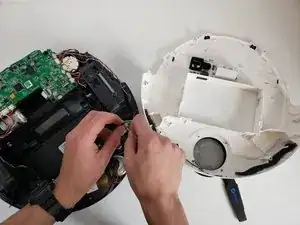
Unter Umständen kann die Hauptplatine beschädigt werden, insbesondere dann, wenn der Deebot Wasser ansaugt. Diese Anleitung zeigt, wie du sie austauschen kannst.

  1. cVHXroOd2QmmmIEx
    cVHXroOd2QmmmIEx
    jQQCtdUFVFH2RmuG
    • Entferne die acht Kreuzschlitzschrauben #00 von der Unterkante des vorderen Stoßprofils.

  2. H5AgGyvq6XChQPRe
    • Entferne den schwarzen Streifen von der Unterseite des Stoßprofils.

  3. SGHYMJJexfLtrLKY
    SGHYMJJexfLtrLKY
    yoOpbKOnP3As2264
    • Hebe das Stoßprofil vorsichtig hoch, bis es sich ablöst.

  4. UADkZUE2gmBgncyG
    UADkZUE2gmBgncyG
    vMeA13dOwNNT1xUY
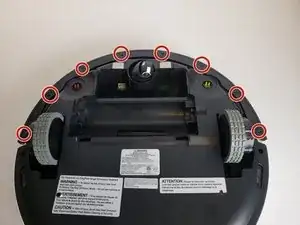
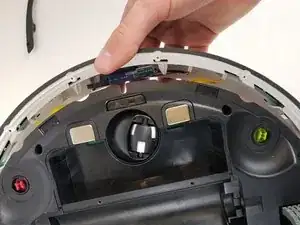
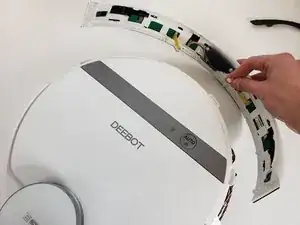
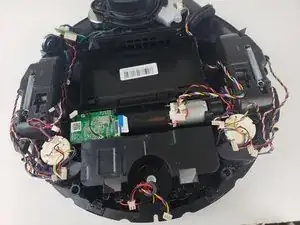
    • Trenne die beiden Kabel ab, mit denen das Stoßprofil am Deebot angeschlossen ist.

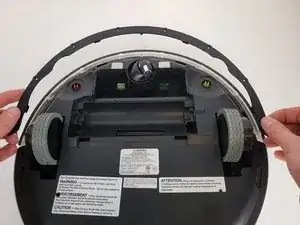
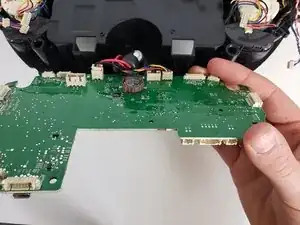
    • Entferne das vordere Stoßprofil vom Gerät.

  5. sSRjWadmhwVKaPMQ
    sSRjWadmhwVKaPMQ
    UKy3duFTkfKPFL6X
    • Drehe die sechs Kreuzschlitzschrauben #00 am Rand des Gehäusebodens heraus.

    This was actually to toughest part. I have a Deebot T9+ and it is slightly different (not much) and it is always a bit scary when you have to remove "plastic fixeners"

    RobinB -

  6. xSlyamjTv56DOfZe
    xSlyamjTv56DOfZe
    dREJOmWpALY52D5N
    • Setze einen Jimmy in die Naht ein und führe ihn rund um das Gehäuse herum.

    • Löse die beiden Kabel ab und entferne den Gehäuseboden vom Gerät.

    Thank you for your work on this guide!

    Dominick Borrego -

    Im not able to remove the bottom case. I have a Deebot 711

    rocksmum -

    This step is difficult, but takes some time and patience, keep pulling. I managed to open it by pulling from the front part which was previously covered by the bumper

    Michele Pandini -

  7. wkWqUqVuINPJlyPk
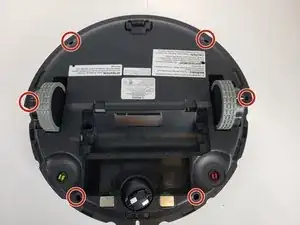
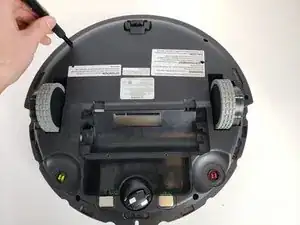
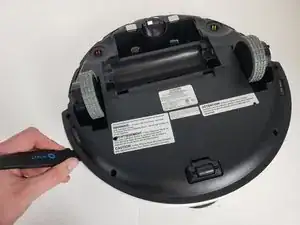
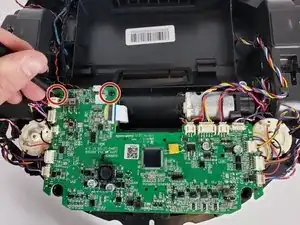
    • Drehe die beiden schwarzen Kreuzschlitzschrauben #00 heraus, mit denen die Hauptplatine befestigt ist.

  8. vXwsFxyNVRpJ3Y6n
    • Trenne vorsichtig die Flachbandkabel oben an der Hauptplatine ab.

    • Merke dir, welches Kabel wohin gehört.

    It could be give you put letters on the cable connects A to Z on the picture so when putting them back you could check on the picture if you forgot any.

    supertoaster2@gmail.com -

  9. sCZlvqUXlrtxUc4k
    • Löse die letzten drei Flachbandkabel von der Unterseite der Hauptplatine ab.

  10. 6CptTrLbYbsD4TjI
    • Hebe die Hauptplatine hoch und entferne sie vom Deebot.

    Salve sto cercando una vostra scheda,mi può aiutare?

    scheda ecovacs zj2025_mb_v0.2_20210301

    Grazie

    xina xin -

Abschluss

Um dein Gerät wieder zusammenbauen, folge den Schritten in umgekehrter Reihenfolge.

Gillian Blumer

Mitglied seit: 16/01/20

596 Reputation

3 Kommentare

Any suggestions on purchase options?

Curtis Tyler -

vakum ozmo 900,hidup terus mati,lampu led juga mati,switch masih posisi on

markus arif -

If anyone is keen to see how to replace a motherboard on the Ecovacs Deebot Ozmo 950 (same for T5), here's a video guide on how I did it: https://youtu.be/jlsOlYYFl8k. If the link doesn't work, search YouTube for "Ecovacs Deebot 950 Stopped Working! How to replace MOTHERBOARD and make it work again!!". The motherboard replacement cost me $90 AUD from AliExpress. Basically, my Deebot 950 was no longer charging despite me installing a new battery replacement, and when I'd turn on the robot, it would back out of the charging dock and then simply turn off (deactivate), and there was nothing I could do. The motherboard is the problem. I replaced it myself and now it works like brand new again. Hopefully my video guide helps others. I was literally on the verge of throwing this cleaner into the rubbish thinking it no longer works.... but gave it one last attempt to fix and glad I did! :)

Jel Builder -