Einleitung

Als Ergebnis eines Zuckergetränks, das auf meine Fernbedienung verschüttet wurde, funktionierten die meisten meiner Knöpfe nicht mehr. Um das zu beheben, suchte ich im Internet nach einer Demontageanleitung, fand aber nichts. Da ich bereit war, die Fernbedienung durch eine neue zu ersetzen, beschloss ich, es mit dem Zerlegen zu versuchen.

Haftungsausschluss: Meine Fernbedienung ist nach der Demontage und dem Wiederzusammenbau zu 100 % funktionsfähig, aber ich habe möglicherweise eine interne Verriegelung beschädigt, da die Frontplatte an den unteren Nähten nicht mehr so bündig ist wie bei der Auslieferung.

Werkzeuge

  1. kLyjiwcC5YAq5VOF
    • Entferne zuerst die Batterieabdeckung und 2 AAA-Batterien.

    • Es gibt zwei Versionen der SHIELD TV Fernbedienung 2019 mit leicht unterschiedlichen Vorgehen zum Entfernen der Batterieabdeckung - siehe Link.

  2. MGHA2wnYnalCjrFR
    MGHA2wnYnalCjrFR
    UjD2usGpdToHsb2T
    mjsOAjl1GDqHZuwN
    • Das obere und das untere Gehäuseteil sind zusammengeklebt. Die Handhabung und Funktion des D-pads hängt vom Abstand dieser Teile ab. Du erzielst wahrscheinlich das beste Ergebnis, wenn du den Kleber beim Zusammenbau erneuerst.

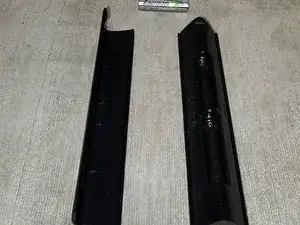
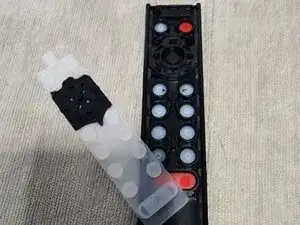
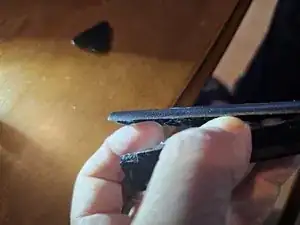
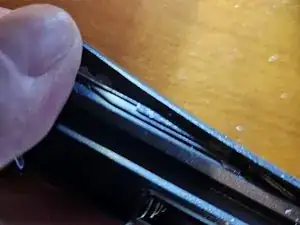
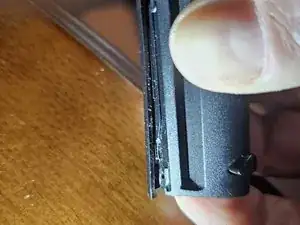
    • Verwende ein Kunststoffwerkzeug, um das Gehäuse der Fernbedienung von der Vorderseite zu trennen. Beginne unten an der Stelle, an der die Frontplatte und das Gehäuse zusammentreffen, und arbeite dich vorsichtig nach oben zur Oberseite der Fernbedienung.

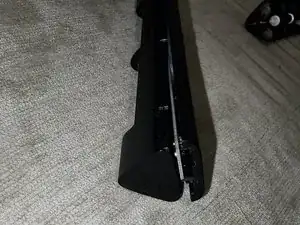
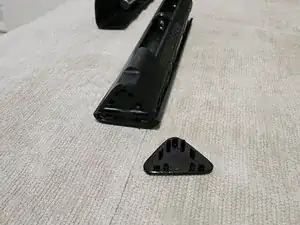
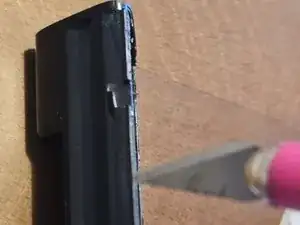
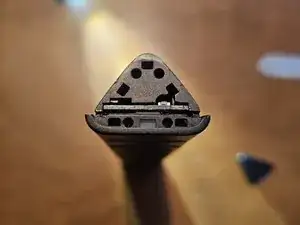
    • Am oberen Ende der Fernbedienung stößt man auf einen gewissen Widerstand, wenn man versucht, die Teile zu trennen. Das liegt daran, dass das dreieckige, glänzende Plastikteil an die beiden Teile angrenzt. Ziehe es vorsichtig ab (dort befindet sich keine Elektronik).

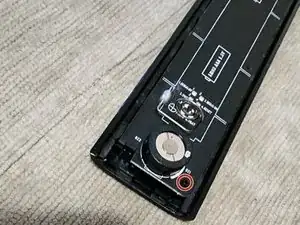
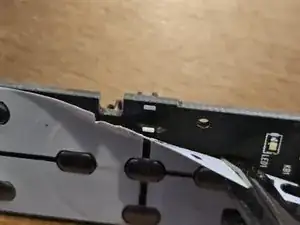
    • Schiebe den Rahmen vertikal von vorne. Wenn du siehst, dass die mittlere Batteriefeder noch an der hinteren Abdeckung befestigt ist, gerate nicht in Panik wie ich und denke, du hättest sie von der Platine abgerissen - sie ist in die Abdeckung integriert.

  3. GZpJcbIAhBKTZYOj
    GZpJcbIAhBKTZYOj
    bKjdPNVJWTUh3MQW
    pZTc5ZWCKoiHk1Sc
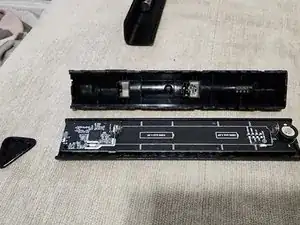
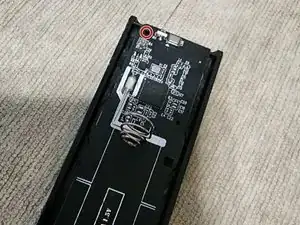
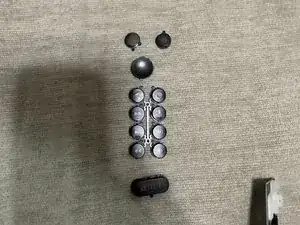
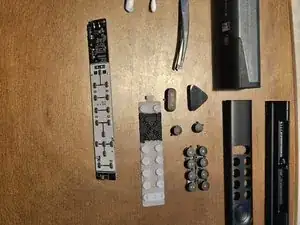
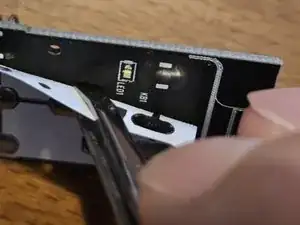
    • Fasse die Leiterplatte an den Kanten und hebe die Leiterplatte von den Kunststoffabstandshaltern ab.

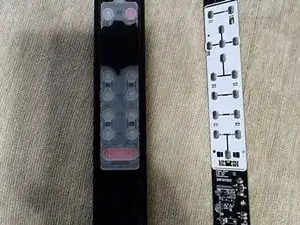
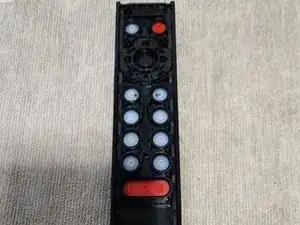
    • Jetzt ist die Platine von der Frontplatte und den Tasten getrennt.

    • Tipp zum Wiederzusammenbau: Die Federn auf der Platine passen in die entsprechenden Aussparungen auf der Innenseite der Batterieabdeckung.

  4. nyXBXPqkZGSdKp5L
    nyXBXPqkZGSdKp5L
    BC5cVOKUrRlx4TXV
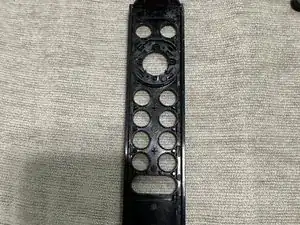
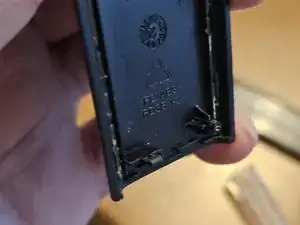
    • Der Kunststoff für die Tasten, die mit der Platine interagieren, ist einteilig und kann von Hand entfernt werden.

  5. BAWaZ3nUqxR2ErBi
    BAWaZ3nUqxR2ErBi
    hJPvxBeMfMVcjnIb
    xYcQujCCOvpRnr5Y
    • Entferne die Tastenabdeckungen.

    • Tipp zum Wiederzusammenbau: Die Innenseite der Frontabdeckung ist mit Rillen versehen, um sicherzustellen, dass die Tasten in der richtigen Ausrichtung angebracht sind.

  6. 4sMfMtQRaAXCXAo2
    4sMfMtQRaAXCXAo2
    xjBqaiFOqghBNfSt
    1aTaLQlE6seP3ChC
    • Die verbleibenden Schritte zeigen die Fernbedienung in verschiedenen Stadien der Demontage. Verwende diese Bilder bei Bedarf als Referenz.

    • Diese Bilder zeigen das seitliche Gehäuse und das Ende der Fernbedienung ohne die Abdeckung.

  7. VLYU4OOBMbmFVhaP
    VLYU4OOBMbmFVhaP
    dQLKGsl5TaQAyr6h
    ruCEVpLHECcH4QEb
    • Diese Bilder zeigen die Tasten und die Platine in ihrer Gesamtheit.

  8. TPrjEuXZrOQWyZI6
    TPrjEuXZrOQWyZI6
    3vuLGh3wMrUZI6jJ
    y4CBoSGHJfLifuUy
    • Diese Bilder zeigen die Kanten der hinteren Abdeckung und die Unterseite der Leiterplatte.

Abschluss

Um die Fernbedienung wieder zusammenzubauen, befolge diese Anweisungen in umgekehrter Reihenfolge.

ColdestCore

Mitglied seit: 18/07/16

383 Reputation

13 Kommentare

Why are you "imposing" the manual's steps as if it were a photo album? In my modest view, this might not be the best way for it to look - pictures definitely don't belong where you've put them.

Jiri Altman -

Hey Jiri. I am not entirely sure what you mean regarding your feedback of what I posted. Could you clarify?

ColdestCore -

I can't recommend attempting this. I got mine to come apart but it refuses to snap back together again. Close inspection suggests that the two pieces are actually glued/fused together so you're not disengaging snaps when you pry it apart... you're actually breaking the spots that hold it together. Even my best efforts result in the directional pad not being closed together tight enough to allow it to register clicks.

Scott Remick -

Hey Scott and sorry to hear about your d-pad. In the teardown I left that d-pad ring in place since the cleaning I needed to do was mostly underneath it.

Looking back at the picture, it does appear that there are 4 snap-like pieces, in diagonal directions, that hold the ring to the rest of the plastic. Are those what you meant that broke during your take apart?

ColdestCore -

Same issue with the d-pad and I was able to reassemble it successfully. Still unclear if it was glued/fused but I did not need to re-glue them. The d-pad is extremely finicky and you need to have the pieces exactly lined up or pushing the d-pad buttons seems like there's no resistance or pushback. Slide/shuffle the pieces around and push it together. Then try pushing up, down, left, right, middle and see if they "click" or "thud". Do that like 50 times and you might get it lined up.

Definitely take the triangle off the front, the little shaded IR cover. Once you have the pieces lined up, click the triangle back on and it holds things in place. If you leave it on, it prevents you from positioning the pieces.

I also had issues with the spring (battery holder) providing a tiny amount of pushback against the faceplate. That tiny gap was enough to cause issues with the d-pad registering. I bent it down.

I would only take apart a hopeless remote to fiddle with it before trashing it. Not for a simple cleaning.

akatherder -

Once you have detached the controller, it is no longer possible to assemble it back. Only separation should be done carefully and without breaking. Afterwards, it should be glued with a strong adhesive that does not damage.

Kakirman -

I followed steps 1 and 2 in order to clean my buttons and it worked great and went back together perfect!

Liam Briggs -

Unfortunately my nvidia remote is also glued. I was attempting to open the remote to disable the neflix button as I do not have netflix and simply breathing on my remote would activate the button. I uninstalled netflix but the button would then take me to the google sign in page. Very irritating when watching a movie and picking the remote up would punt me out of the show. I have dissambled remotes and other snapped together equipment (tablets, phones, laptops) for years and between this and the terrible way to pop open the battery cover, this is not a good design. They definitely do not want you in there.

I ended up using UV setting epoxy to freeze the netflix button from pressing. I can pop off the epoxy if I ever decide to get netflix. It doesn't look super attractive but still looks better than a remote damaged beyond repair because we simply wanted to be inside it. 0 out of 10 on the repairability scale from me

Rick Fecho -

Hello team,

Same here, i believe incould tear it down without damaging the various plastic frame element, but reassembling it over i face the gap at the base of the remote (where you would have started to dismantle it).

I tried various angle to have it stick but it cant go back to the sapcing it was at the beginning.

Be aware, whether you really need to open it then

Dridge -

* Only open remote after point of no return since you'll have to glue it back together to get a snug fit around some buttons and proper connection when pressing them.

.

* If some buttons stopped responding, and just cleaning the surface with isopropyl alcohol didnt work, you can carefully peel the white plastic film on the PCB, clean the PCB underneath the peeled film, especially the connection points for the tactile domes (the tiny metal pieces) they should still be attached to the peeled film.

Then carefully remove the non responsive tactile domes from the film, clean them on both sides with alcohol and place them back on the film perfectly centered.

Carefully reattach the plastic film so the tactile domes don't move.

.

* If you removed the ok button and dpad ring, make sure the 4 tabs on each and extra pins on the ring are lined up properly.

If it won't snap into place you've likely broken a tab or pin, remove it again and check if any are folded inwards and now blocking it.

If so, just remove it. No big deal.

Jey -

Needs a picture of the other side of the PCB where the microphone(?) part at the bottom back is. Having dropped it a few (hundred) times that peice broke off. Looks like it is attached with two bits of hot glue on the inside but I am not sure which of the two ways it goes back together. There is a little white marker that would show me which way to re-glue it if I could see this board.

Bruce Broken -

Hey ! I’m in the same boat. Did your end doing the repair ? Any tips ?

Matt Wayne -

That’s awesome ! I was looking for a picture of a “healthy” PCB, as in mine, the little round thingy at the bottom of it came loose. I’m gonna re-solder it, but just for my information, does anyone know what is its purpose ?

Matt Wayne -