
Einleitung
Folge dieser Anleitung, um die Handschlaufe am linken Controller eines Valve Index VR Headsets zu ersetzen.
Schalte dein Index Headset und den Controller vor Reparaturbeginn aus und trenne sie von der Stromversorgung.
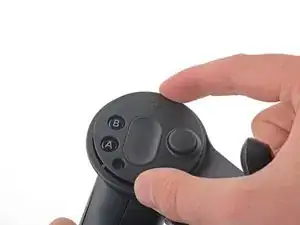
Hinweis: Die Fotos in dieser Anleitung zeigen den rechten Controller, die Vorgehensweise ist aber exakt die gleiche.
-
-
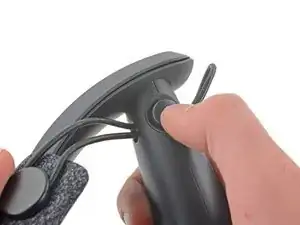
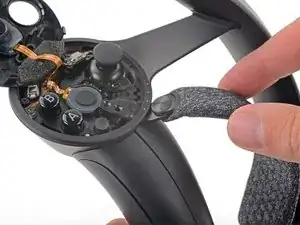
Drücke und halte den Knopf für die Gummiband-Einstellung.
-
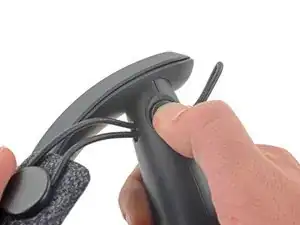
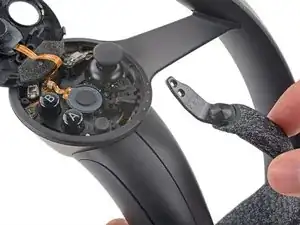
Ziehe das Gummiband aus dem Controller heraus.
-
-
-
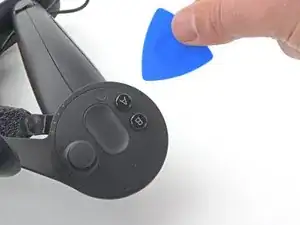
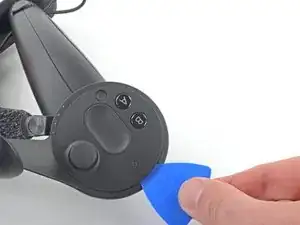
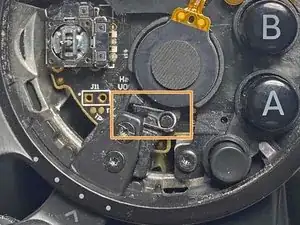
Setze ein Plektrum unter die runde Kunststoffabdeckung ein, bei den Knöpfen A und B.
-
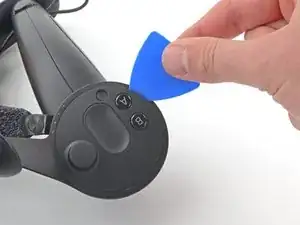
Schiebe das Plektrum oben um den Controller herum, bis alle drei Kunststoffclips gelöst sind.
-
-
-
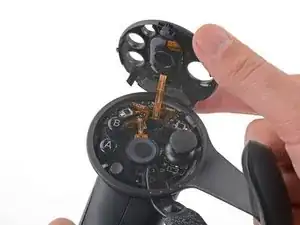
Öffne die Oberseite des Controller vorsichtig, um an die Schrauben im Inneren heranzukommen.
-
-
-
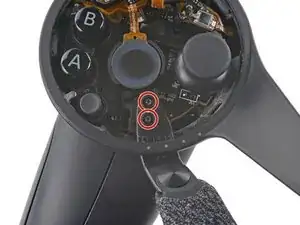
Benutze einen T5 Torx Schraubendreher, um die beiden 6,1 mm Schrauben zu entfernen, mit denen die Schlaufeneinstellung am Controller befestigt ist.
-
Sobald die Schlaufeneinstellung abgeschraubt ist, kann die darunterliegende Feder herausfallen.
-

Vergleiche das Ersatzteil mit dem Originalteil. Es kann sein, dass du vor dem Einbau des Ersatzteils fehlende Komponenten übertragen oder Schutzfolien entfernen musst.
Um dein Gerät wieder zusammenzubauen, folge den Schritten dieser Anleitung in umgekehrter Reihenfolge.
Entsorge deinen Elektromüll sachgerecht.
Hat die Reparatur nicht ganz geklappt? Versuche es mit ein paar grundständigen Lösungen, ansonsten findest du in unserem Forum Hilfe bei der Fehlersuche.

5 Kommentare
Doesn't explain how to put it back together with the spring which is conveniently missing from the photos.
Draylynn -
I'm several months late, but just in case I figured I'd toss a reply just in case you were interested in the imgur guide I made to help out anyone else struggling with this. It's posted as a separate comment on this post. Hope your repair went well otherwise!
I appreciate the guide, but as someone noted above, you are seriously lacking in the spring instructions, which might be the most important part of this assembly. However, I managed to find a way to get the spring seated back in on my own, and so for any other unfortunates stumbling onto this guide, I made my own crappy Imgur gallery guide for re-seating the spring. Each image has a small paragraph beneath it explaining the steps to take. I hope it manages to help anyone else struggling to swap out a strap.
(NOTE: Images were made for Right hand controller, simply mirror for Left hand.)
https://imgur.com/gallery/RQYtS5e
I hate this guide for not including the pics for the spring. You don't happen to still have the pics, do you? The imgur link is dead and I've spent the last hour or so trying to fit the spring, but I can't figure out any way how. Would be a lifesaver if you could share these pics again!
DarkKryo -
In fact, using a pry tool alone cannot open the circular plastic cover. You can try using a small flathead screwdriver or tweezers to insert into the joystick hole on the side near the tracking ring, utilizing leverage to create a gap (first push the joystick down before inserting). Then, insert the pry tool and unlock each clip one by one. However, this method requires a certain level of skill and may cause cosmetic damage, so please proceed with caution!
Hrenact -